
A crushed oyster shell walkway can give a garden path a light, coastal look while creating a defined route through the landscape. The right result depends on more than choosing a surface: plan the route, prepare a stable base, control the edges, and direct water thoughtfully. This guide focuses on those walkway decisions and links to our broader crushed oyster shell applications guide for other uses around the landscape.
Discuss a walkway or landscape project
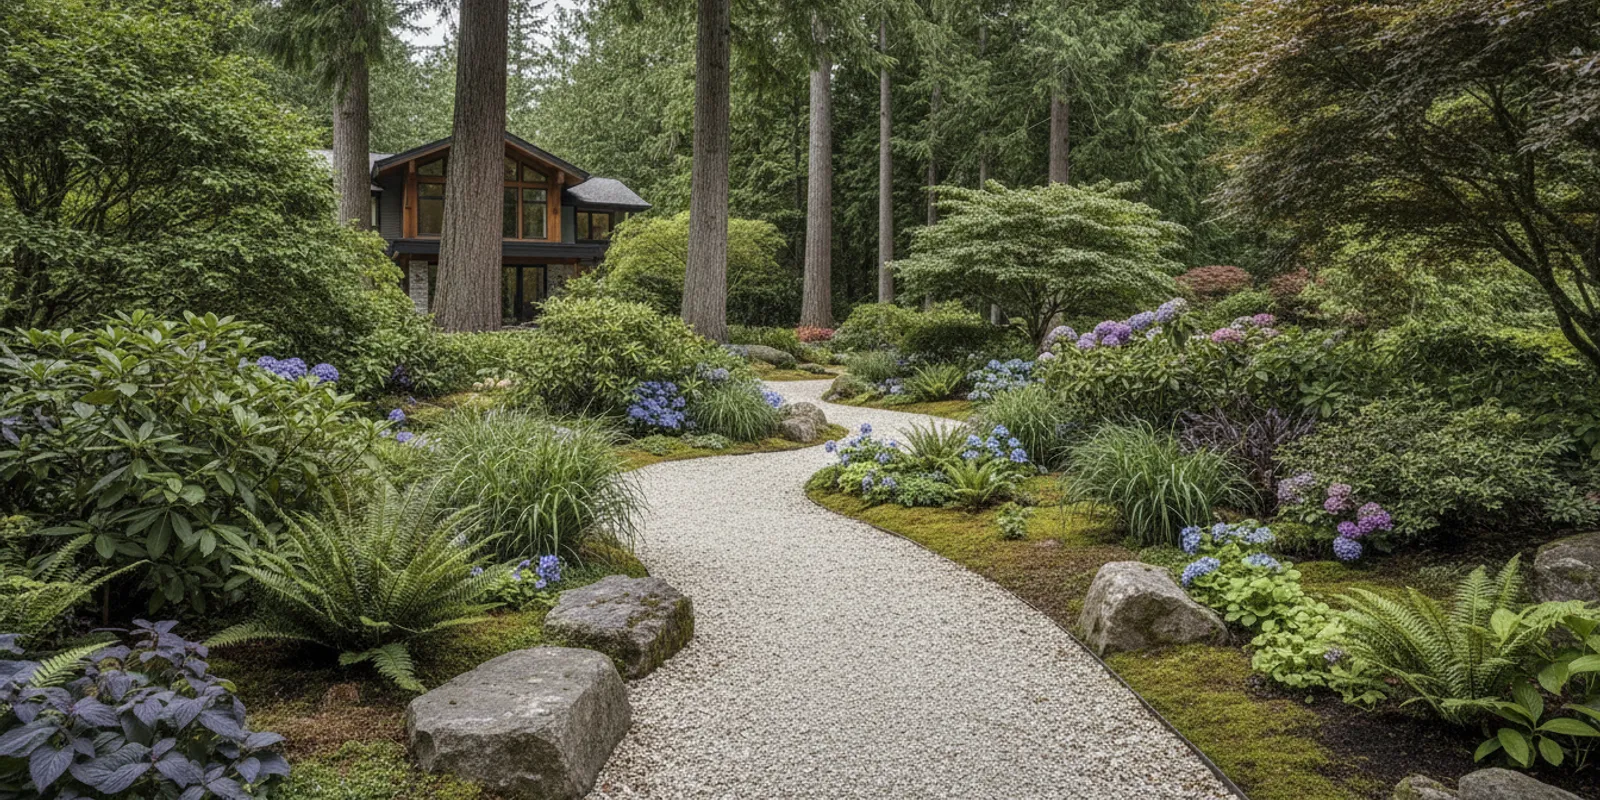
Why crushed oyster shell is ideal for garden paths and walkways
A garden path has a practical job: it connects destinations without sending people across planting beds or muddy ground. The surface also shapes how the garden feels. Crushed oyster shell has a pale, natural appearance that can bring a coastal note to a path, courtyard, or transition between outdoor spaces. It is a distinctive alternative to a conventional dark gravel surface.
Shell can suit a path where you want a loose, natural-looking aggregate rather than a uniform manufactured finish. Its fine shell material, sometimes called shell flour, can help fragments bind together when the surface is installed and compacted appropriately. ShellScapes describes the material as capable of compacting and recalcifying into a hard, sturdy surface. The final feel still depends on the material, the base, the level of compaction, drainage, and how the path is used.
Think about the whole route before settling on the surface. A narrow garden stroll used occasionally has different needs from a direct route between a driveway and a frequently used entrance. Consider whether people will carry food, move a wheelbarrow, push a stroller, or use mobility equipment along it. A loose aggregate path may not be the right fit for every level of accessibility or every wheeled use. Where a smooth, firm, highly uniform surface is essential, compare other materials and construction approaches before committing.
Shell is also one option among a larger family of landscape materials and applications. See the overview of crushed oyster shell uses and coverage, or learn more about ShellScapes’ recycled oyster shell material. The broader guide includes other applications; this article stays focused on planning a path that works for its particular site.
How should you plan the route, edging, and drainage?
Start by walking the route you are considering. Mark its beginning and end, then note the natural destinations along the way: a gate, patio, seating area, garden entrance, or service access. A path that follows the way people already move often feels more useful than one drawn only to make a tidy line on a plan.
- Check the slope. Observe where water travels during and after rain. Avoid shaping a path so it funnels runoff toward a building, a neighboring property, or a place that already holds water.
- Choose a comfortable width. Base it on how people will use the path and whether people need to pass. Measure the intended width at several points; curves and pinch points can change the material estimate.
- Look below the surface. Existing soil, roots, buried utilities, and the condition of any old path affect excavation and base preparation. Do not cut major roots or dig where utilities may be present without checking first.
- Decide how the path meets other surfaces. Plan clean transitions at a patio, step, driveway, or threshold. A path edge that ends abruptly at a different material can scatter or create a trip point.
- Select edging to match the design and site. Natural stone, metal, or another suitable edge can help define the line and contain loose surface material. The choice should work with the adjacent paving, planting, and grade.
Edging is not just a decorative border. It helps keep aggregate from migrating into planting beds and makes the finished width easier to maintain. The edge must be secure and set at an appropriate height relative to the path surface. If it sits too high, it can catch a toe or wheel; if it is too low or interrupted, shell can spill over it. At steps and transitions, make the change in level visible and safe.
Drainage deserves attention before installation, not after a puddle appears. A path should follow the site’s drainage plan rather than act like a small dam or channel. Existing slopes, soil, downspouts, nearby paving, and the destination of runoff all matter. Avoid promising that any aggregate surface will solve a drainage problem on its own. For a site with persistent standing water, a steep grade, or runoff concerns, have the conditions assessed as part of a broader landscape plan.
Research on oyster shells in a stormwater setting is not a direct test of garden paths, but it reinforces why particle size and clogging conditions matter. Washington’s Stormwater Action Monitoring report says lightly crushed, larger oyster-shell pieces worked best in its study to prevent clogging of stormwater catch basins during rain. That finding concerns catch basins, not a residential walkway specification; do not use it as a substitute for designing the path base and drainage for your site. Read the Washington Stormwater Action Monitoring report.
For a project that includes more than a path, ShellScapes’ hardscaping work and landscape design and installation pages offer context on related outdoor construction and design. A coordinated plan can resolve route, planting, and adjacent hardscape decisions together instead of treating the path as an isolated strip.
How do you install a crushed oyster shell walkway step by step?
The exact construction depends on site conditions and intended use. The sequence below is a planning framework, not a universal engineering specification. Soil, slope, drainage, path width, and traffic can change what base and installation method are appropriate.
- Lay out the path. Mark both edges with stakes, a garden hose, or another visible guide. Walk the line from each direction. Check that its width and curves feel comfortable and that the route connects the destinations it is meant to serve.
- Confirm the site. Identify buried utilities before digging and check for roots, drainage features, or other constraints. If the route crosses a steep slope or handles significant runoff, get appropriate site-specific advice before proceeding.
- Excavate and shape. Remove sod and unsuitable loose material to the depth needed for the planned base and finish. Keep the route’s grade intentional and avoid creating a low trough that collects water. The required excavation depth is site-specific; it cannot be set from the shell coverage figure alone.
- Prepare the base. Use a base material and preparation method suited to the ground and expected use. A soft or poorly drained subgrade may need a different approach than firm, well-drained ground. Compact and shape the base as appropriate, while preserving the drainage path planned for the site.
- Install secure edging. Set edging along the layout and check its height and continuity. Keep transitions at entrances, patios, and steps neat, stable, and easy to cross. Recheck the clear walking width once the edging is in place.
- Spread the shell evenly. Add the crushed oyster shell in a controlled layer. The stated coverage for ShellScapes material is about one cubic yard per 100 square feet at a depth of 2 to 3 inches. That is a planning reference for the shell layer, not a calculation for the base or excavation.
- Compact and finish. Compact the shell appropriately for the product and the intended path, then check the surface for an even finish. Avoid leaving loose piles, abrupt lips, or hollows. If the material shifts or feels unstable, pause and review the base and installation method rather than simply covering the issue with more shell.
- Check after use and weather. Walk the completed route and look again after rainfall. Watch for movement, pooling, or shell spreading beyond the edge. Address the cause early, especially at transitions and low points.
Some homeowners can take on a straightforward path; other sites call for integrated design and construction. Consider professional help when the path has significant grade changes, complicated drainage, a long run, multiple steps, heavy use, or tight connections to existing paving. ShellScapes’ guide to choosing a hardscape contractor covers questions to consider when planning a local project. Its Bainbridge Island hardscaping guide provides further local planning context.
How much crushed oyster shell do you need per linear foot?
There is no single amount per linear foot because path width changes the area. First calculate square footage: multiply the path’s length by its average width. Then use the shell coverage figure as a starting point. ShellScapes states that one cubic yard covers about 100 square feet at a 2 to 3 inch depth and weighs approximately 1,500 pounds.
For a quick estimate, a path that is 2 feet wide covers 2 square feet per linear foot. At 100 linear feet, that is 200 square feet, or about 2 cubic yards at the stated depth. A 3-foot-wide path covers 3 square feet per linear foot; 100 linear feet is 300 square feet, or about 3 cubic yards. The table assumes a consistent width and uses the stated 100-square-foot coverage per cubic yard.
| Average path width | Area per linear foot | Area per 100 linear feet | Approximate shell per 100 linear feet |
|---|---|---|---|
| 2 feet | 2 sq ft | 200 sq ft | 2 cubic yards |
| 2.5 feet | 2.5 sq ft | 250 sq ft | 2.5 cubic yards |
| 3 feet | 3 sq ft | 300 sq ft | 3 cubic yards |
To estimate a project of another length, multiply the length by the average width, divide the square footage by 100, and use that result as the approximate number of cubic yards. For example, a 40-foot path averaging 2.5 feet wide is 100 square feet, which corresponds to about one cubic yard at the stated 2 to 3 inch depth.
Curves, widened areas, landings, and inconsistent widths add area. Measure those sections separately where possible, then add them to the main path calculation. The coverage figure is an estimate, not a promise that every site will use exactly that amount. The actual finish, the material delivered, and the accuracy of your measurements affect the order. The figure also does not include the base layer. Do not use the approximately 1,500-pound-per-yard weight as a substitute for checking delivery access or handling requirements.
If the path joins a patio or driveway, estimate each surface separately. Shell quantities for other applications can differ with the area and design. The oyster shell driveway guide discusses a different use; a driveway has different loading and construction considerations from a garden walkway.
Oyster shell vs. pea gravel vs. river rock for garden paths
All three are aggregate choices, but they create different looks and walking experiences. The best fit depends on the desired character, how firm and even the surface needs to feel, the setting, and how much loose material the site can accommodate. Compare samples in the actual garden if color and texture are important.
| Path surface | Look and feel | Planning considerations | May suit |
|---|---|---|---|
| Crushed oyster shell | Pale, coastal character with shell fragments | Plan a stable base, clear edging, and a suitable shell layer. Confirm that its texture and firmness meet the needs of people using the path. | Garden paths where a light-toned, distinctive aggregate is part of the landscape design |
| Pea gravel | Rounded, relatively small stones in a range of colors | Loose rounded particles can move underfoot or travel beyond the path. Edging and a well-planned route matter. | Informal paths where the rounded-stone appearance is preferred and movement is manageable |
| River rock | Rounded stones that may be larger and more visually prominent | Particle size and shape affect how comfortable and stable the surface feels for walking. Larger stones may be less suitable for a fine, even walking surface. | Decorative areas or path details where stone size and visual texture fit the design |
These are broad comparisons, not guarantees: aggregate grades vary, and installation matters. Ask what size and grade will be supplied, see a sample in daylight, and consider a small test area if you are unsure about the feel. A path’s surface should make sense alongside the paving, planting, and architecture around it. Explore the ShellScapes project gallery for examples of landscape settings and material combinations.
Think about maintenance as part of the comparison. Any loose aggregate can shift, collect leaves, or need occasional top-up. A decorative material that looks right in a sample may behave differently on a steep, exposed, or frequently used route. Where stable rolling access is essential, compare a firmer, more continuous surface with a qualified designer or installer rather than assuming an aggregate path will perform the same way.
What maintenance does an oyster shell walkway need?
Maintenance is usually about keeping the path defined and correcting small changes before they spread. The amount of attention depends on foot traffic, weather exposure, adjacent planting, the quality of installation, and the behavior of the site.
- Keep the edges clear. Brush or rake escaped shell back into the path when practical. If material repeatedly migrates, check whether the edge is secure and whether the path is receiving runoff.
- Remove leaves and debris. Clear organic debris before it accumulates. Use a method that removes the debris without scattering the shell into nearby beds.
- Watch low spots. After heavy rain, look for standing water, channels, or material movement. A recurring wet area can signal a grading or drainage issue, not merely a need to add more shell.
- Refresh the surface selectively. Where the finish thins, first identify why. A small, suitable top-up may be enough, but repeated loss can point to poor containment, runoff, or an unsuitable base.
- Keep transitions safe. Check the meeting points at steps, paving, gates, and thresholds. Correct loose lips or uneven changes that could catch a foot or wheel.
ShellScapes describes properly installed oyster shell as virtually maintenance-free, but that should not be read as maintenance-proof. Debris, weather, use, and site conditions still affect a path. Good drainage planning, stable containment, and a sound base can reduce avoidable problems; regular observation helps you catch issues early.
For another material-specific planning example, see the oyster shell bocce court guide. A bocce court has its own dimensions and surface needs, so its recommendations should not be transferred directly to a walkway.
Ask ShellScapes about your walkway plan
Frequently Asked Questions
Is crushed oyster shell comfortable to walk on?
Comfort depends on the shell grade, installation, and personal needs. A properly prepared and compacted surface may feel firmer than loose, freshly spread material, but it is still an aggregate surface. If someone using the route needs a very smooth or predictable surface, test a sample and compare other options before deciding.
Can I install an oyster shell path over existing soil?
Do not assume that spreading shell directly on soil will create a durable path. Soil condition, drainage, foot traffic, and the desired finish determine how much preparation and what kind of base are appropriate. Remove unsuitable material and plan the base and edging before ordering the shell.
Will oyster shell prevent puddles on my path?
Not by itself. The path’s grade, subgrade, base, and the surrounding runoff determine how water behaves. If water already ponds in the route, identify the cause and plan drainage before installing a surface layer.
How do I calculate shell for a curved path?
Break the route into manageable sections, estimate each section’s length and average width, and calculate area for each. Add the sections together, then divide total square footage by 100 for an approximate cubic-yard quantity at the stated 2 to 3 inch depth. Add widened landings or other areas separately, and treat the result as an estimate.
Plan the path as part of the garden
A crushed oyster shell walkway works best when its route, base, edging, and drainage are considered together. Measure the path, check how the site handles water, compare aggregate samples, and match the surface to the people and uses it needs to serve. For a coordinated landscape plan, learn about the landscape design process or contact ShellScapes to discuss your project.